Corrections
Objective:
Look through your image collection and try to find one containing dust shadows and another with polygon flare.
Beginning with a dust correction, scroll through the image at 100% magnification identifying dust spots and removing them. Whatever the post-processing software, they will all work by tempting replace the area of the dust speck with a texture, tone and colour of its immediate surroundings. This is, therefore, actually altering the content of the image, although on such a small and trivial scale that few people would argue against it. When the dust speck is in an area without any nearby sharp detail, the tools work very well. But if the dust speck is only a few pixels away from detail, or even sits on top of the detail, you may find the results less satisfactory.
More effective in this situation is the clone Stamp tool, but you will now find that you have to make more of a conscious decision to replace the small area with something specific. Is this as innocent correction as using the dust removal tool? Also, if you work over an area of the image that includes random specks of similar size to dust, as in the example, you will have difficulty deciding whether a mark is dust or content. This raises another valuable consideration – is this particular speck real from the scene, or an artefact caused by dust on the sensor? Should you remove it? Does this bother you?
Lens flare correction takes more skill and more intervention, as there are no tools specifically for the job. The various possibilities, including attempting to make a precise selection of the flare polygons before applying, say, a curve adjustment. This is very difficult to achieve. It is recommended that a different, less invasive approach, as follows:
- use a clone tool sets to colour to integrate the flare polygons to their intermediate surroundings
- use a clone toolset darken, also with a close neighbourhood source
These two actions, performed carefully, should remove most of the apparent blemish, and possibly sufficiently image.
How justifiable do you think this exercise was? If the flare is considered a mistake (this is not always the case; flare can be used creatively in composition), is there an argument that it should be left in as is? Note the results in your learning log.
Setup and Preparation:
Find suitable images from my image library.
Results:
I’ve decided to process all three of the stated scenarios, rather than just the required one.
In my DPP Reflections 27 posting (here), I commented that I could not find images with dust spots in my image library. What I did find however, was a JPEG image that seemed to show what looked like ‘hot pixels’; strangely, I couldn’t see them in the RAW file when magnified. The purposes of this exercise, or process this image showing how the clone tool can easily remove these bright marks on a plain background, such as a plain background, with minimal effort.
This first image is the original JPEG file (I have previous post-processed the RAW file and made a number of changes to the image to bring out detail in the tree foliage, foreground, etc.); you cannot see the ‘hot pixels’ at this reduced in size – but when magnifying the image in Photoshop, these pink and white spots jump out at you. Indeed, I had previously processed this image in preparation for printing at a local photographic exhibition with the camera club. It was only when I showed an online version of the image to a work colleague that he mentioned about these spots; I had been completely oblivious to them in my concentration to bring out the detail in the tree foliage, foreground grass and the mountains behind. There’s a lesson learned for me!
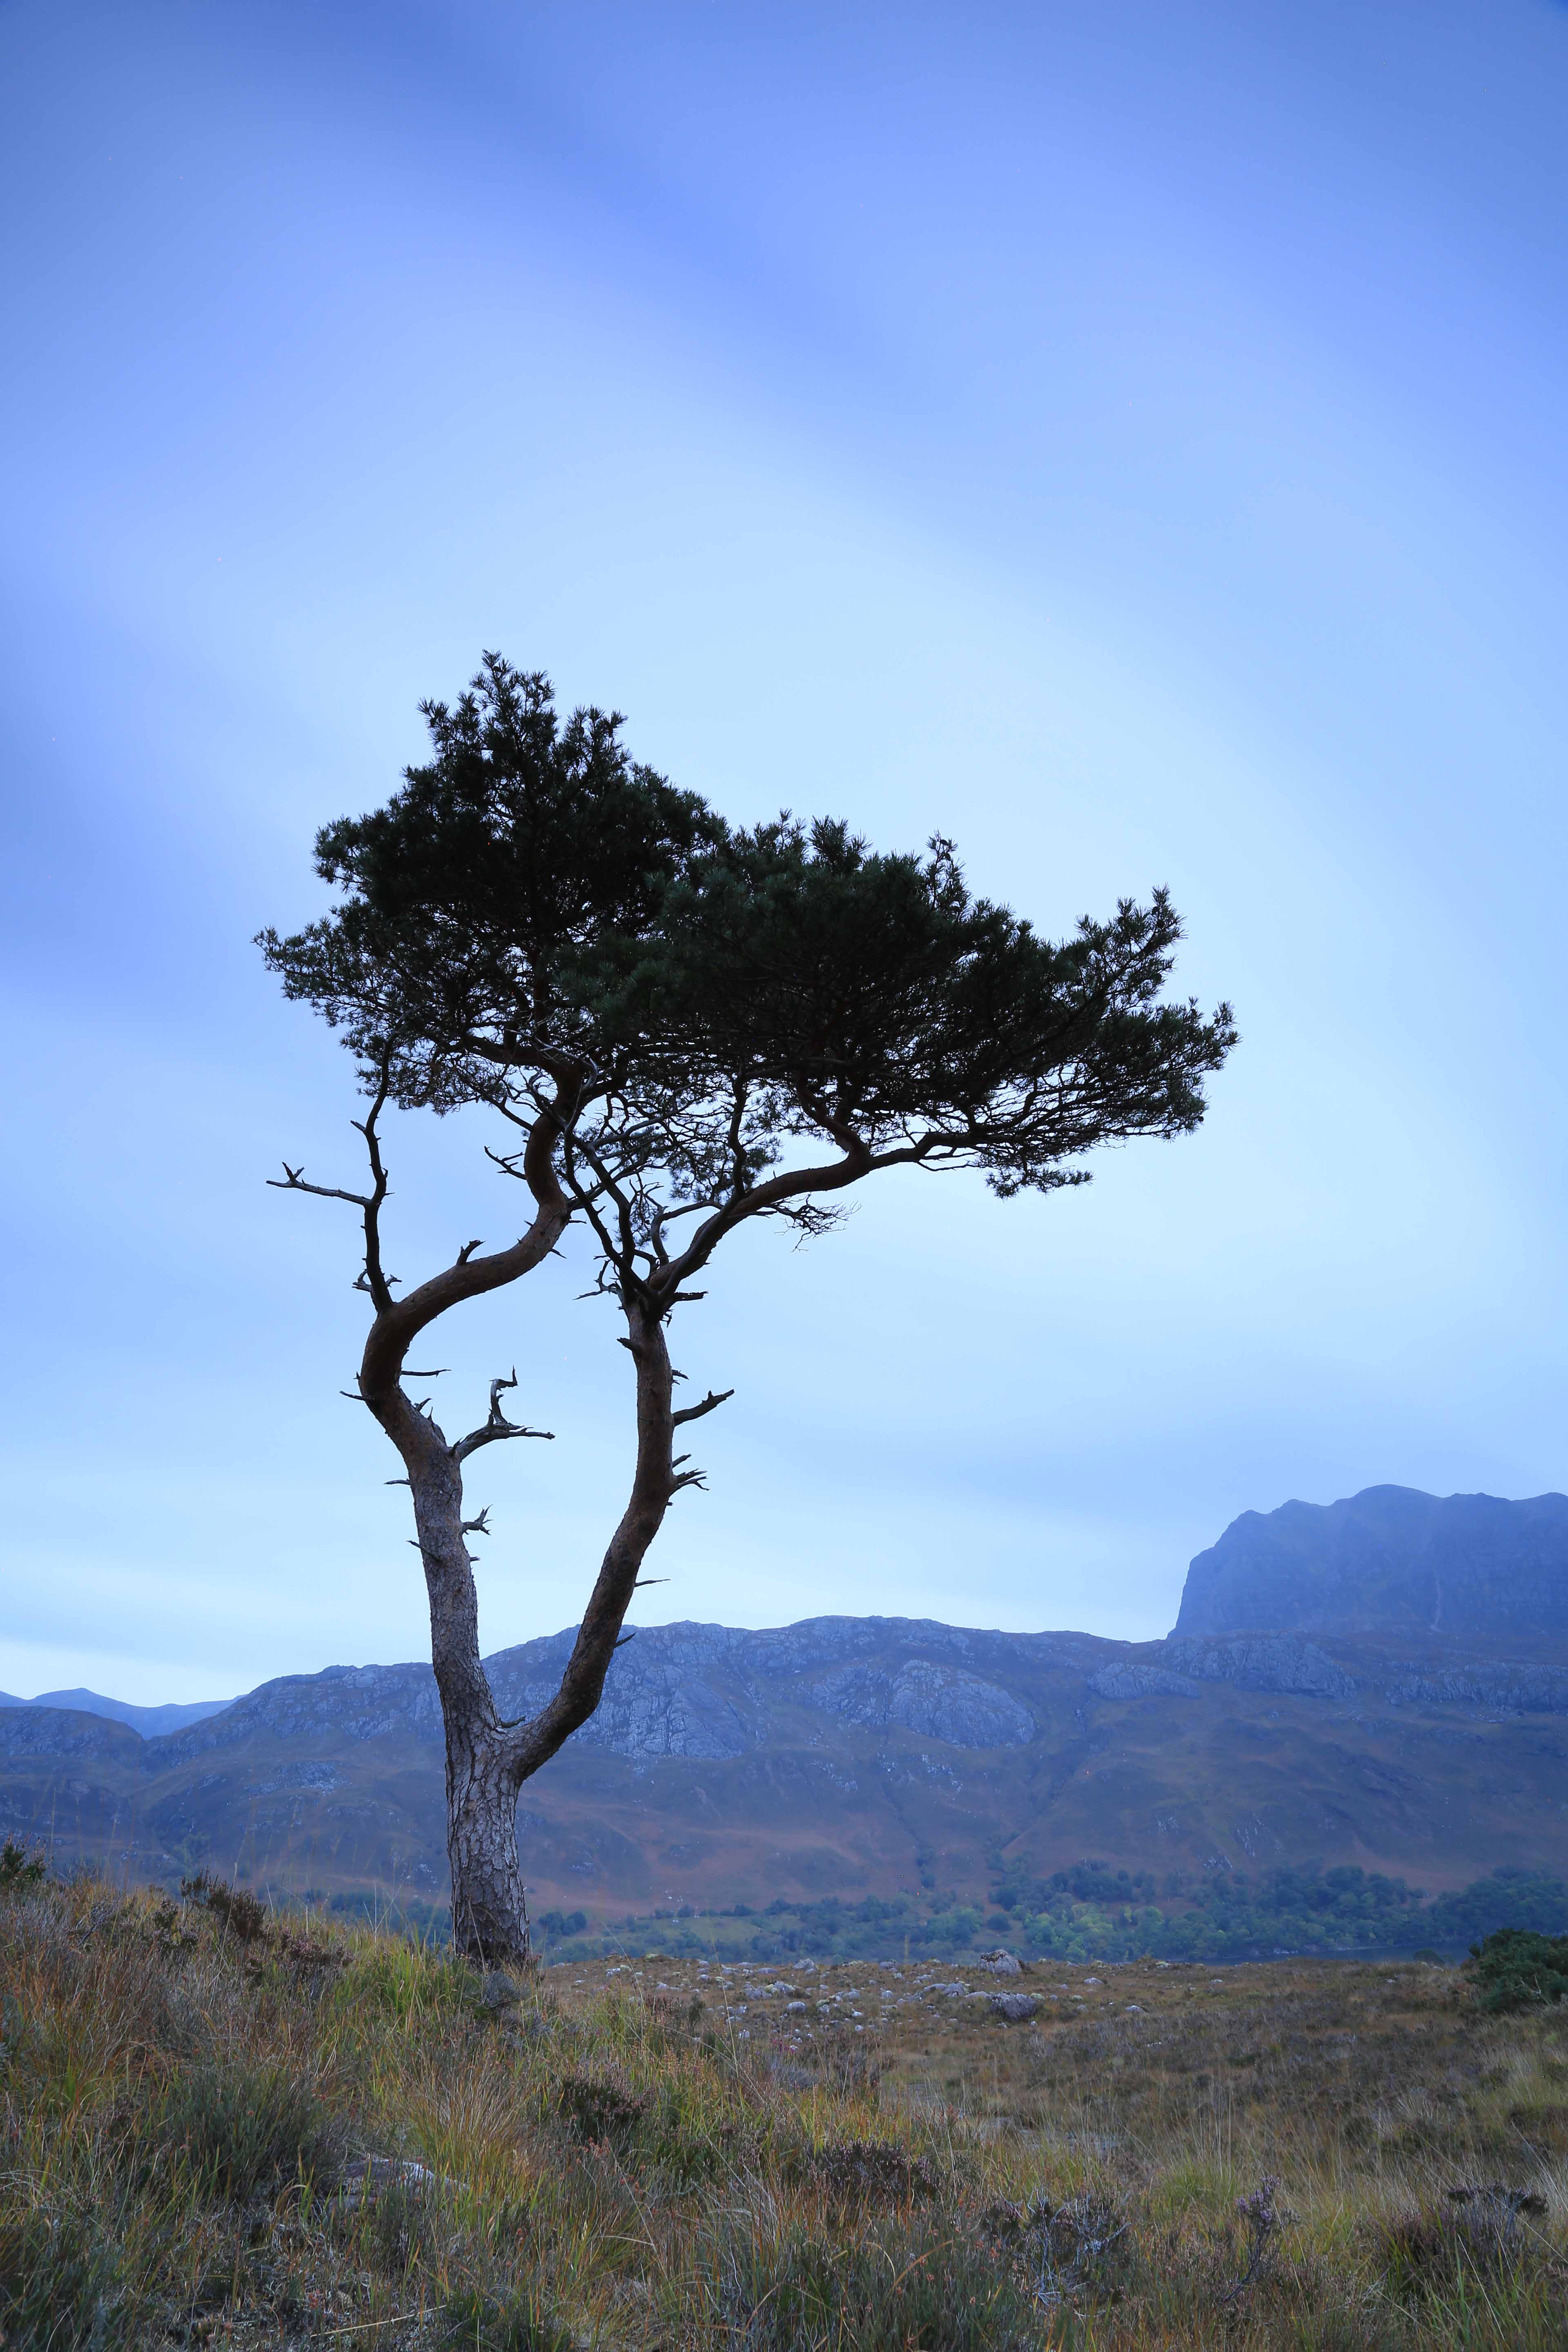
DPP Ex19 Correction Original
This second image is a close-up of the top left corner; we have a plain background and we can see that the really bright spots quite clearly. I’m still not entirely sure they are ‘hot pixels’, but I am wondering whether it was specks of dust or dirt on my attached neutral density filter used with a smallish aperture that brought them into focus. I found similar defects across the image and whatever the cause, they just had to go.
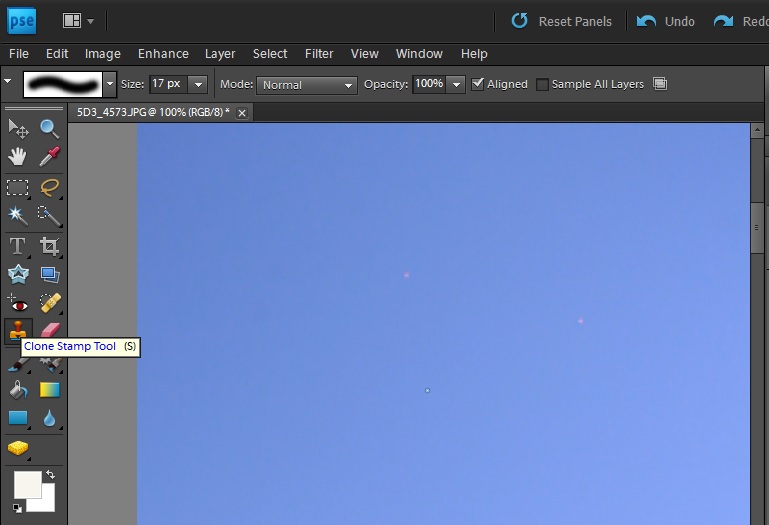
DPP Ex19 PS Correction Clone Tool 1
Using the clone Stamp tool a small area was selected adjacent to each of these marks and they were quickly cloned resulting in a clean image. I ended up scanning the entire image at this magnification and was quite surprised at how many marks there were throughout the image. All were treated in the same manner. In the image below we can see the same top left quadrant now, with the three suspects removed.
In this final image, all the marks have been removed.
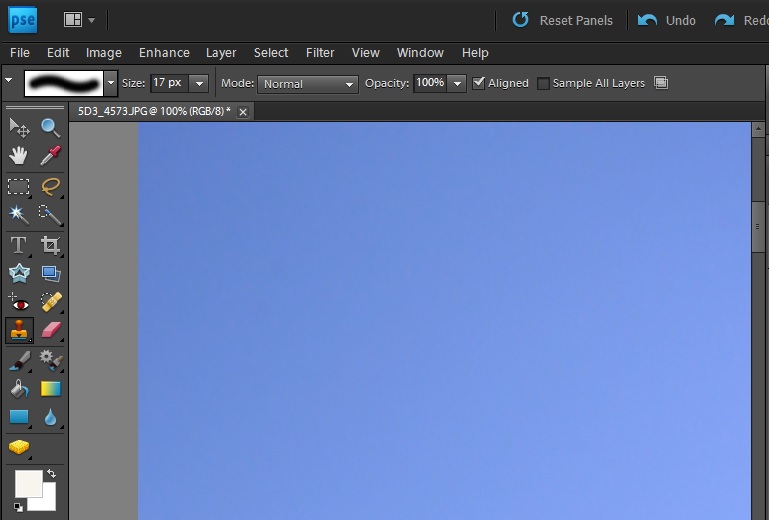
DPP Ex19 PS Correction Clone Tool 2
In a rather more complex process, I repeated this exercise using the Photoshop Filter->Noise->Dust and Scratches option using two layers and the ‘Eraser’ tool. It was a lot more effort that the simple cloning action performed previously.
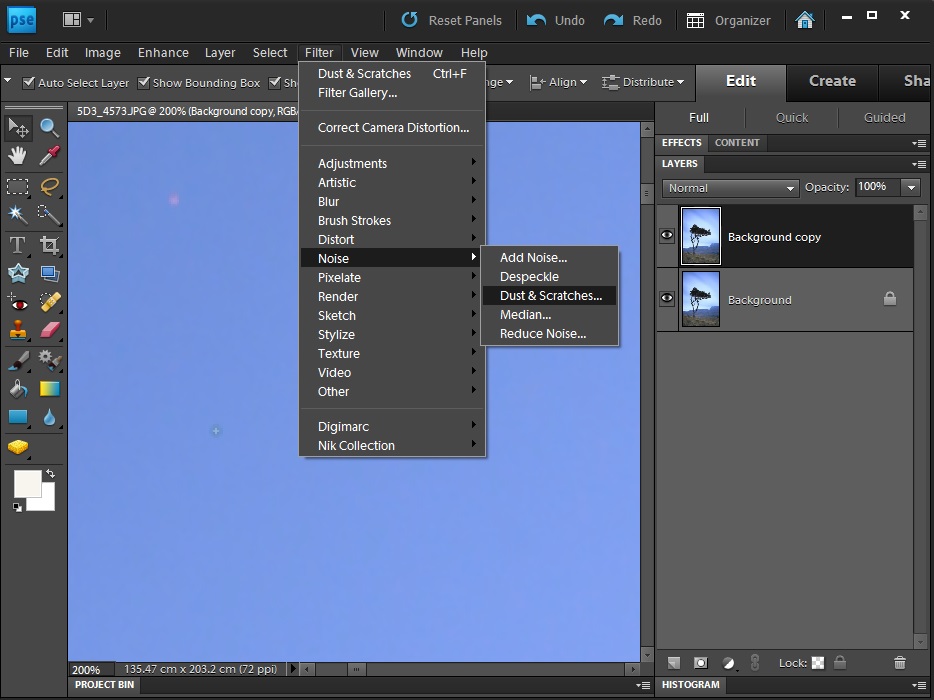
DPP Ex19 PS Noise-Dust Correction 1
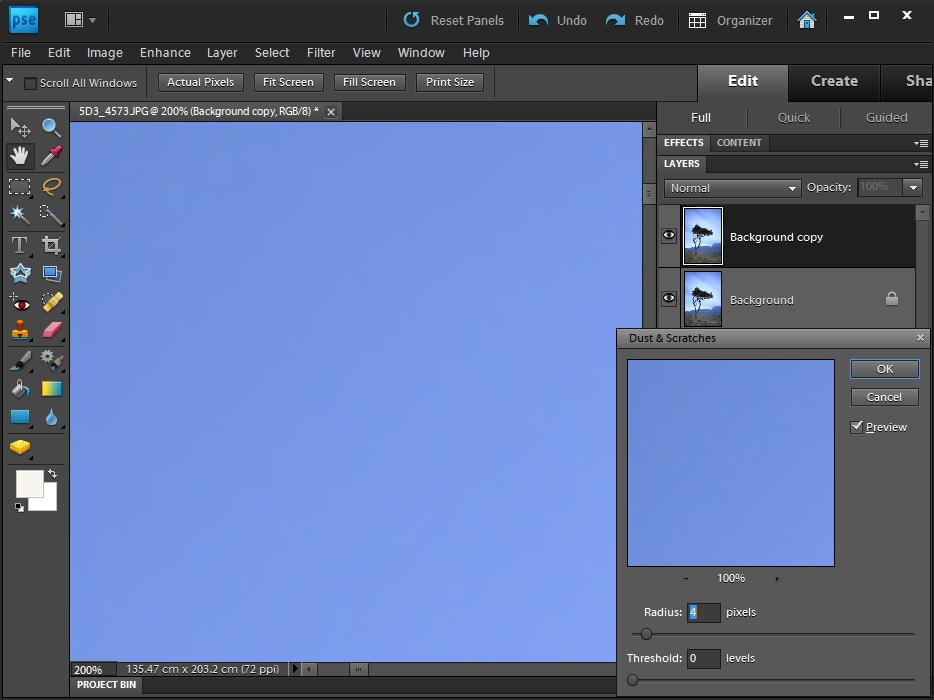
DPP Ex19 PS Noise-Dust Correction 2
What are my thoughts on using the available toolsets in post-processing to remove artefacts introduced either by the camera, such as hotspots, dust on the sensor or even marks on a filter attached lens? I think it’s fair game. Why would you not allow yourself the luxury of being able to correct this type of defect? The image has not substantially altered in any way, shape or form, and quite frankly such manipulation wouldn’t even be mentioned as a substantive form of post-processing if anyone asked. Am I being overtly devious? No, I don’t think so!
**
Here we have an image taken up on the South Downs near Slindon – facing West into a lowering sun. Two areas of flare are present (marked), the first being near the sun itself and the second lower down on horizon line straddling the trees in the middle distance and the grassy foreground. It should be noted that lens flare can be a perfectly valid effect to be left in an image, especially if the intent was to incorporate it at the time taking the photograph.
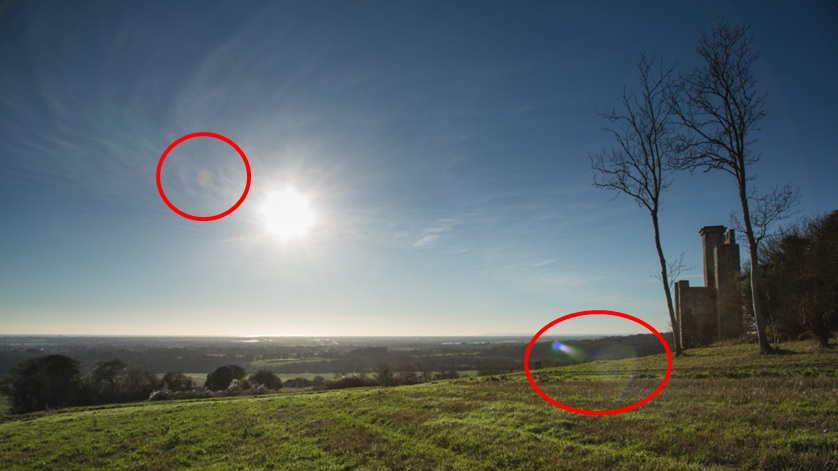
DPP Ex19 Correction Flare Marked
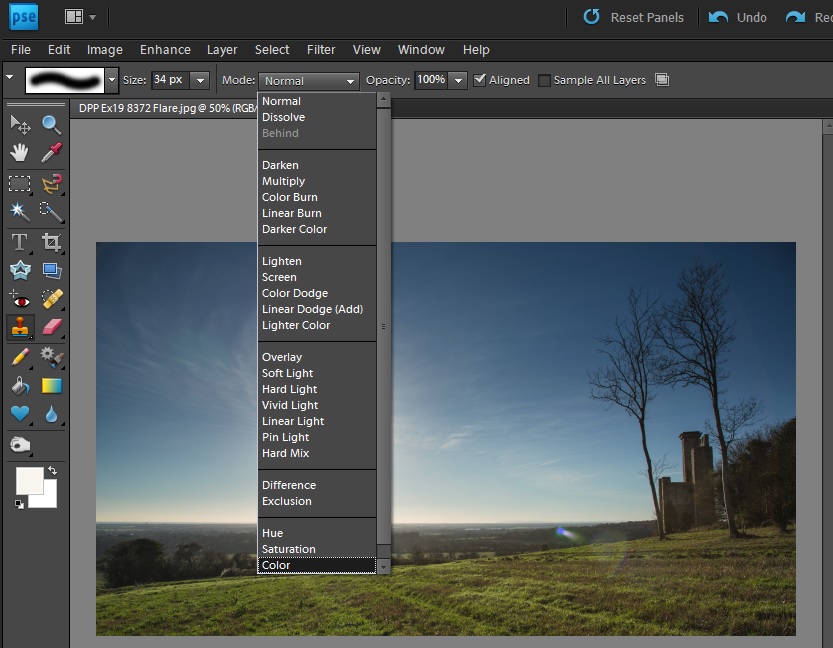
Working within Photoshop, I selected the Clone tool, first using the Color mode and then followed by the Darken mode to repeatedly clone/blend in the areas of flare with the surrounding but unaffected areas. I hadn’t used either of these two particular modes of operation before, having previously relied on the Normal mode in the Clone tool.
DPP Ex19 Correction Flare PS 1
..and the final edited image.

DPP Ex19 Corrections Flare Removed
I’m still not particularly pleased with the ever-so-slightly different lightness of the grass area in the final image, but it’s a lot better and had I simply cloned using the approach that I would have used previously.
Observations and Comments:
What are my thoughts on using the available toolsets in post-processing to remove artefacts introduced either by the camera, such as hotspots, dust on the sensor or even marks on a filter attached lens – or in the second case, through lens flare?
Personally, I think it’s fair game for these relatively simple and non-additive/deductive manipulations. Why would you not allow yourself the luxury of being able to correct this type of defect, especially in the case of artefacts introduced by something internal to the camera?
The images have not been substantially altered in any way, shape or form, and quite frankly such manipulation wouldn’t even be mentioned as a substantive form of post-processing if anyone asked. Am I being overtly devious? No, I don’t think so! In the following exercises where more substantive manipulation is required, then my views *may* change.
