Sharpening for Print
Objective:
Take an image that you have processed as the reference standard, with some edge detail and some smooth areas. A portrait is ideal – with the eyes carrying wanted detail, and the skin smooth areas that you do not want to be over sharpened. For the reference image, make sure that you have applied no software sharpening.
Make three more versions, each with a different degree of sharpening. There will be a certain amount of trial and error in this, but make sure that the weakest of the three is quite close in on-screen appearance to the unsharpened original, and that the strongest is noticeably aggressive.
Print all four (unsharpened original plus the three differently sharpened versions) at full size. Next, with neutral white lighting next to the computer screen, compare these prints with each other and with the 100% magnification images on-screen.
Write down the differences you see, and also your assessment of which degree of sharpening seems to your taste to be the most appropriate for the image in print form.
Setup and Preparation:
Find suitable image from my image library to work with.
Results:
I took an original RAW file and processed it in Lightroom, applying a square crop and minor adjustments to the shadow areas of the hat and highlights on the right arm and cheeks. No sharpening applied and created a TIFF file (Baseline-6003.tif) from which to work from.
As instructed, I exported four files from Lightroom for printing and I selected the ‘Matte Paper’ option using ‘No’, ‘Low’, ‘Medium’ and ‘High’ sharpening options from the Export function.
Created a new blank page for printing (12×8) and added each image that had been sharpened to a lesser or greater extent to a new file and saved as a JPEG without further sharpening.
Re-opened each file in Photoshop and created new Adjustment Layer and applied a 20% brightness adjustment (prints tend to come out much darker than when compared to the same image on a screen).

DPP Ex24 No Sharpening

DPP Ex24 Lowest Sharpening

DPP Ex24 Medium Sharpening

DPP Ex24 Highest Sharpening
Observations and Comments:
When comparing the printed output against the same image on the computer screen, it is readily apparent that the screen is a lot ‘sharper’ and more texture and detail can be seen when compared with the same printed out image.
Only the images printed with ‘Medium’ and ‘High’ levels of sharpening come close to the detail seen in the on-screen image. Areas of comparison are the skin areas on the nose and left cheek and the wide ribbon around the hat. My personal preference is the medium level of sharpening for this particular printed image and selected paper type.
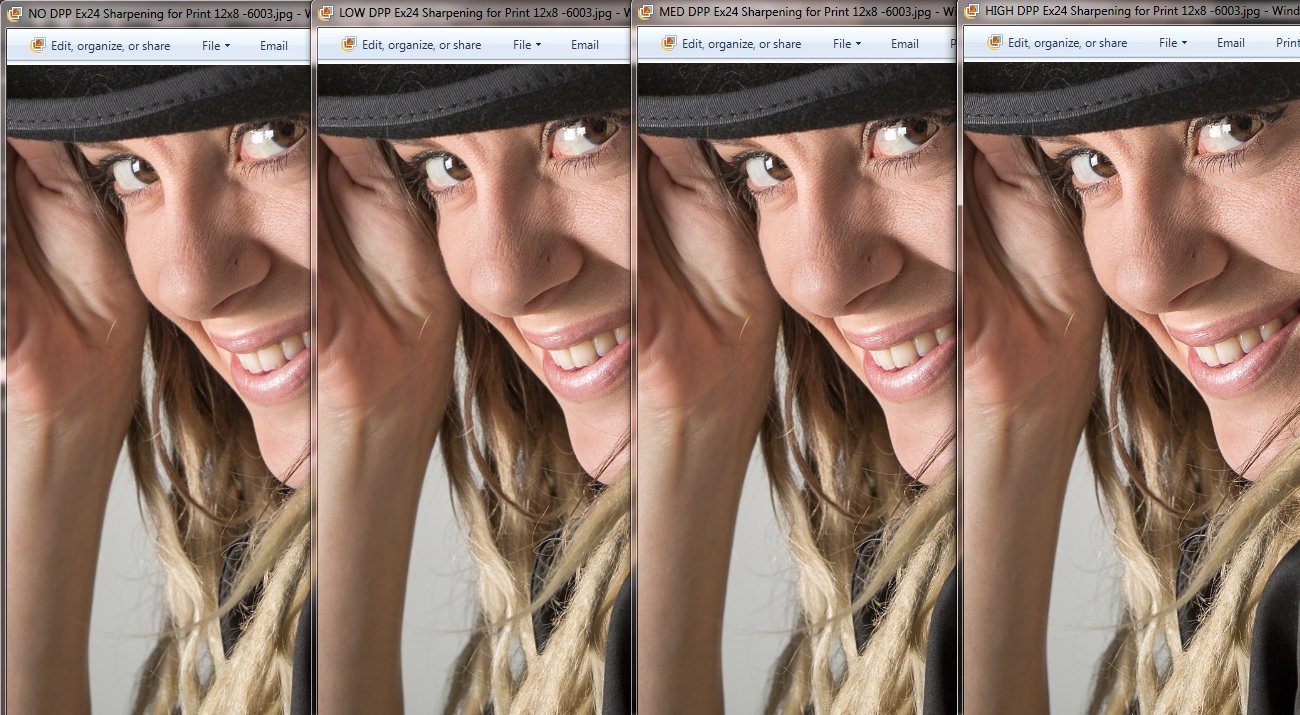
DPP Ex24 Sharpening for Print Comparison
Another useful exercise from which I have learnt from.
There is a good source of information on the general concepts of image sharpening, including output sharpening, on the Cambridge in Colour website
http://www.cambridgeincolour.com/tutorials/image-sharpening.htm
From a personal perspective, it has been unusual to start printing out photographs again in support of this course. It was once the only real way of viewing and sharing images, but now electronic formats are preeminent with prints way behind in terms of popularity. I have found that printing for camera club competitions has relied on an initial period of experimentation – as images often come out darker when printed when compared to projected or on screen displays. Likewise, output sharpening – and the amount required – will vary greatly based on the type of image/image content, the paper type selected/available and the desired ‘look and feel’ of the final image. Regardless, the necessary amount of sharpening will still likely depend on the image content, type of paper, printer type and the look you want to achieve. I hate to say it, but there is a fair degree of trail and error (and wasted print outs!) before a successful outcome is achieved. This will (hopefully) be minimised in the future as I become more skilled in this activity.
